


I've recently picked up another secretary desk, it was the medallion on the front that sold me it is stunning. Although, true to form, this desk like other secretary desks in the past has proven to be quite the project. One would think I'd have realized by now that my enthusiasm for these desks inevitably entails additional effort.
Let's see just how much work it took!


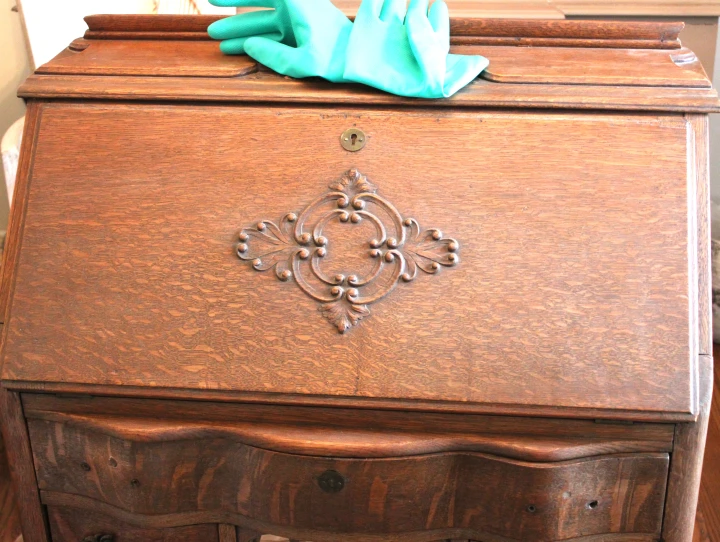
The first time I saw this piece I was smitten. The lines, the medallion and scroll work were a perfect candidate for dry brushing a technique I have been wanting to try. I know my wood lover friends think it is beautiful as is, but there was too much damage to be saved.


The desk had been stored by the previous owner for many years, so it really needed a good cleaning.


To repair the areas where the veneer was damaged, I removed any loose pieces around it, then applied a bonding agent to fill in the gaps (a list of all products used will be provided at the end of the post). If the veneer was partially detached, I applied glue and secured it in place with clamps until dry.


I removed the hardware that was originally on the piece because I didn't like it. To use the single knob I preferred, I had to fill the existing holes first. Additionally, I removed an odd piece of molding from the top and filled in the holes using the same bonding agent.


Thinking I was all done fixing the damage while sanding, I discovered additional areas that required attention and filled them as well. Hopefully that's the end of unexpected damages.
Phew, that was a lot of work, but all the sanding is done, and it's now ready for painting.
But I am tired the painting and reveal will be in my next post: How To Dry-Brushing On A Secretary Desk Part Two!
If you enjoyed this post, please give it a "like" and subscribe to receive new posts as they are created.
Products Used:

Comentarios